OpenClaw Setup + MEMO MEFS Agent Service: Complete Usage Guide
I. Prerequisites
Setting Up Your Environment
To run the MEFS MCP Server on Windows, you’ll need to install two foundational tools: Node.js (the JavaScript runtime) and Git (for downloading the source code).
Install Node.js:
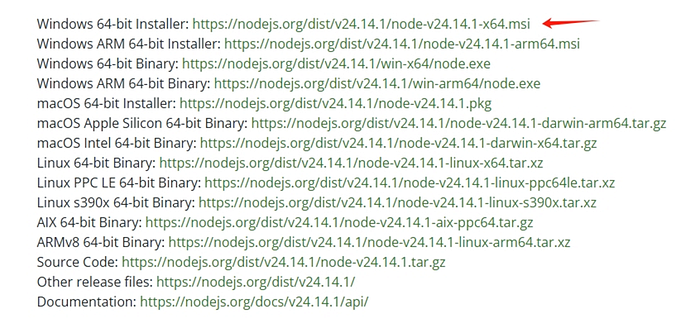
Visit Node.js — Node.js 24.14.1 (LTS).
Select the appropriate version, download it, and run the installer. Keep all default options and click “Next” through each screen to complete the installation.
Install Git:
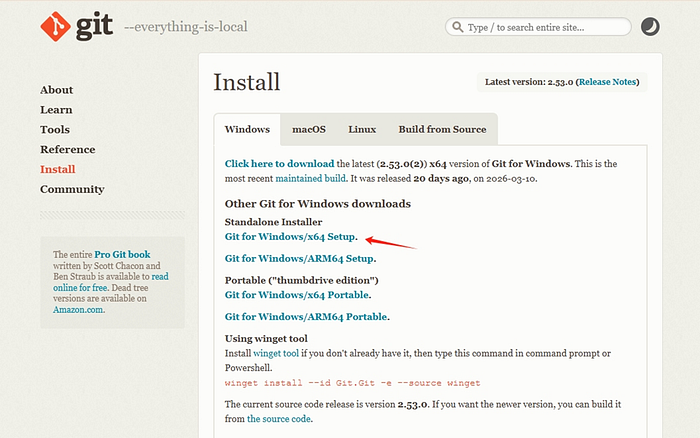
Visit Git — Install for Windows.
Download the Windows version and install it.
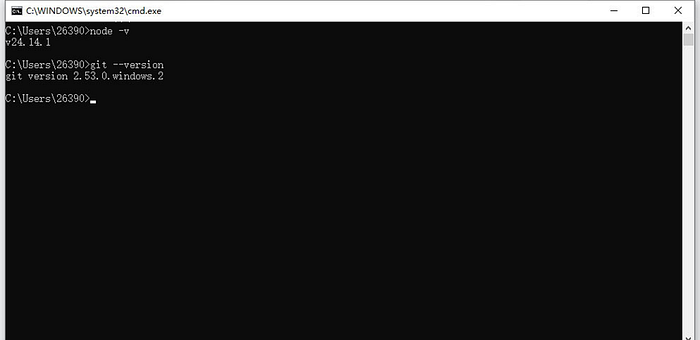
Verify the Installation:
Press Win + R, type cmd, and press Enter to open a Command Prompt.
Run node -v and git — version. If both commands return version numbers, the installations were successful.
II. Installing and Setting Up the OpenClaw Runtime
1. Click the Windows Start menu, search for Windows PowerShell, and open it.
2. Download and install the OpenClaw runtime
Run this command: iwr -useb https://openclaw.ai/install.ps1 | iex
Note: Installation takes approximately 10 minutes. The terminal will display “Installing OpenClaw” throughout the process — please be patient and do not close the window.

3.When you see the prompt “I understand this is personal-by-default and shared/multi-user use requires lock-down. Continue?”:
l Use the Up/Down arrow keys (↑ / ↓).
l Move the cursor to Yes (the confirmation option, typically listed above “No”).
l Press Enter.

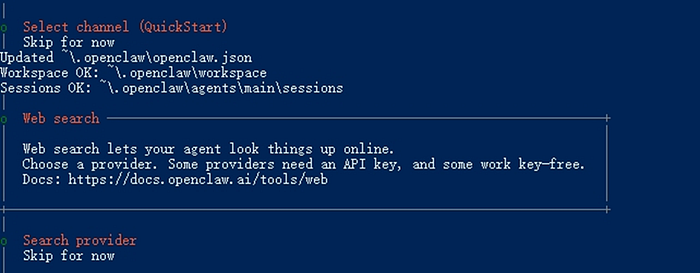
4. When the startup mode selection screen appears, choose “Quick Start”.

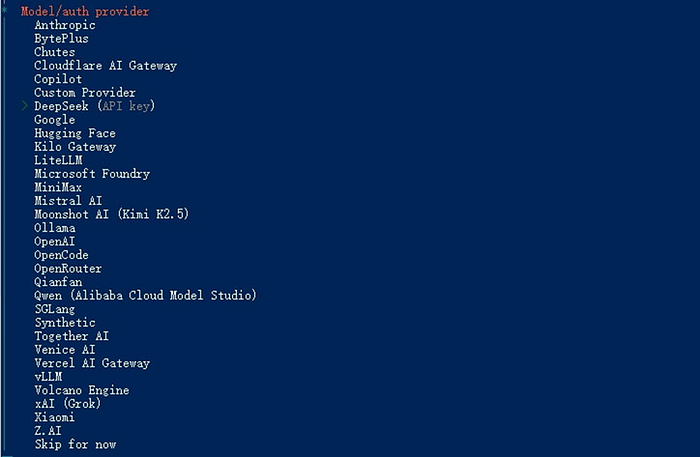
5. Select the AI model you want to use from the list.
6. Enter the API key for your selected model.

You can skip all remaining options.
Configure Skills: We recommend selecting “No” here — it’s much easier to install Skills from the web interface later.

Note: The only required configuration is the API key
III. Install MEFS MCP Server
Open a new Windows PowerShell window.
1. Clone the repository
Run: git clone https://github.com/memoio/mefs-mcp-server.git
2. Navigate into the directory
Run: cd mefs-mcp-server
3. Install dependencies
Run: pnpm install

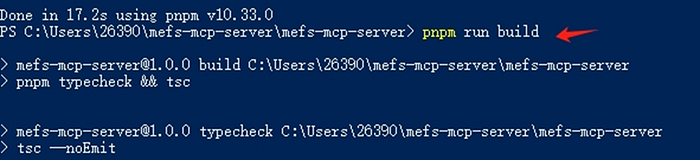
4. Build the project
Run: pnpm build
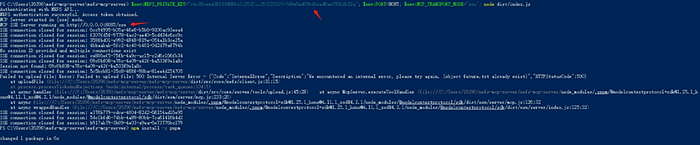
IV. Start the server
Have your EVM private key (without the 0x prefix) ready, then run the following in the current window:
$env:MEFS_PRIVATE_KEY=”your_private_key”; $env:PORT=8085; $env:MCP_TRANSPORT_MODE=”sse”; node dist/index.js
Success indicator:: you should see MCP SSE Server running on http://0.0.0.0:8085/sse.
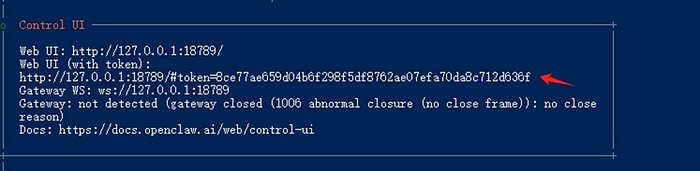
V. Putting It to Work
Once the service is running, open your browser and navigate to the token-authenticated URL shown in the terminal. You can then issue instructions directly to the AI Agent in the chat window.